Are you familiar with those shaped rice balls that are sometimes filled with pickled Japanese plum (umeboshi), meat, fish or vegetables and are covered with seaweed at the Japanese grocery stores? If you don't know what these perfect little snacks on-the-go are, they're called onigiri (おにぎり) or o-musubi (おむすび). They are simple 'gohan' or rice balls rolled into triangle, oval or nigiri shapes and wrapped with 'nori' or seaweed. In Japan, and in most Japanese grocery stores, there is a section for take out onigiri with all kinds of fillings and flavors to please any palate. Onigiri makes rice very portable and easy to eat, which is why they are perfect for picnics or lunches. They are also a filling snack and what I consider the ideal Japanese comfort food. I recently made some onigiri and fresh roasted seaweed to take to a Memorial Day picnic and they were gobbled right up by everyone in no time. I thought I'd share some basics of how to cook rice, how to make onigiri and how to roast seaweed so that everyone can enjoy this delicious and EASY to make combination.
Basic Japanese Rice (Gohan - ごはん)
Making Japanese rice is not that difficult but it does require that you use Japanese rice to get the desired stickiness. Japanese rice is shorter grained and higher in starch content which gives it that sticky consistency. Japanese rice needs to be washed multiple times to purify the flavor and remove any impurities. It even comes in a healthy brown rice variety that I actually prefer. If you can't find Japanese brown rice, regular long grain brown rice from your local grocer will also work - you just have to add more water to give it the sticky consistency that Japanese rice has.

If you don’t have a rice cooker, take the raw rice (anywhere from 2-3 cups depending on how much you want) and put it in a medium to large saucepan. Gently rinse it with water in the sink by pouring water over the rice until it is covered by about 2 inches of water. Swirl the rice and water with your hands until the water looks milky. Carefully pour out the milky water and repeat 3 times or until the water runs clear.

Once the water runs clear, cover the rice with water again but do not drain. The amount of water obviously varies with the amount of rice but here’s a trick that works with any amount. Cover the rice with enough water so that when you put your thumb to the top of the rice, the water covers your thumb about an inch - don't put too much water or you'll have gummy rice. Let soak for about 15 minutes.
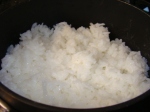
Place the lid on the pan and start cooking the rice on high heat until the water has come to a boil. Turn the heat down to just above simmer and cook for 30 minutes (brown rice may require more cooking time). Remove from heat and let steam with the lid on for an additional 15 minutes before serving. Results should be perfect, fluffy Japanese rice every time! Alternatively, you can buy a fancy shmancy Japanese rice cooker and do all of the above except for the cooking part. You simply stick the bowl insert back into the cooker and press a button for perfect rice. Plus, these rice cookers can keep your rice warm for days!
How to Make Onigiri (お握り or 御握り; おにぎり)
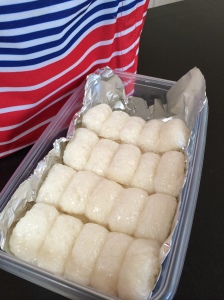
I can make about 50 individual onigiri with 3 cups of cooked rice. You can use freshly made rice or if you have left over rice, you can rehydrate it by popping it in the microwave with a wet paper towel on top to steam for about 2 minutes. I prefer the nigiri shaped mold that looks like little rectangle shapes because I don't usually fill my rice with anything, and these are bite sized.
You can purchase these nigiri rice molds and most Asian grocery stores or a Japanese dollar store like 'Daiso'. Online, you can find them here: [embed]http://www.sushinut.com/equipment/nigiri-rice-mold[/embed]
Here's a short video on how I make them. I use saran wrap on the inside of the mold so that the rice doesn't stick to it. Out pops a vacuum sealed packet of bite sized rice balls to hand out to my hungry little eaters.
http://youtu.be/rzTD_CDlZ-U
Roasting Nori (Seaweed)
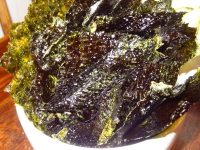
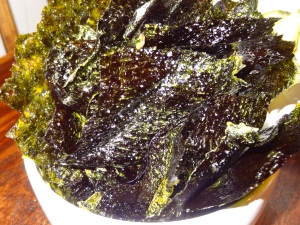
These days you can find roasted and flavored seaweed at every grocery store, even Costco carries them in small snack packs. I prefer to roast my own because I feel like some of the varieties out there are too oily or aren't crunchy enough for me. If you purchase a pack of seaweed made for sushi in big sheets, you can roast these over an open gas flame in seconds. If you do it this way, I promise you'll never go back to those instant packs because these are crispier, tastier and you can make much more for your money.
All you need to do is:
1. Spray both sides of each sheet of seaweed with cooking spray or sesame oil
2. Over a low flame on a gas stove, gently waft the seaweed back and forth on both sides until the seaweed crisps up
3. Set the finished roasted seaweed sheets on a paper towel and repeat with additional sheets
4. Sprinkle each sheet with sea salt and stack them about 4 or 5 high
5. Cut into fourths with a sharp chef's knife or cut into fourths with kitchen shears
Here's a short tutorial video on how it's done!
http://youtu.be/4nbZ4g3wFCM
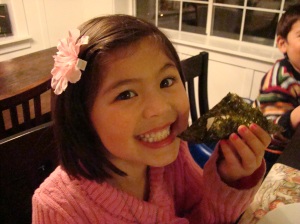
Enjoy your onigiri with crispy nori squares anytime or make a sushi party of your own by following my blog post here - [embed]http://wp.me/p1L4Tl-2F[/embed]


